Steps:
- Create a Vue.js application (if You don’t have one)
- Create a Bitbucket repository
- Register an AWS account (if You don’t have one)
- Create an S3 bucket
- Create an IAM user
- Enable Bitbucket Pipeline
- Commit Your code
- Domain settings
1. Create a Vue.js application
If You already have one, You might skip this step. :)
First things first, You have to install vue-cli. This is the easiest way to create a new Vue project. (You have to install Node.js and npm or yarn first)
Open up Your favorite terminal or console, and type the following:
npm install -g @vue/cli
Navigate to a folder, where You want to create the project:
cd /path-to-folder/
vue create my-project
Some configuration questions will pop up. Leave everything in default. No worries, You can change them later.
And that’s it. Navigate to the project folder and test Your app:
cd my-project
npm run serve
2. Create a Bitbucket repository
If You don’t have an account, you’ll have to register one. In my opinion, it’s the most awesome free git hosting site.
Create a new repo. You can name it whatever You want. I name it vue-devops-project.
If git is not yet initialized by default run the followings:
git init
git add --all
git commit -m 'initial commit'
Go back to the Terminal, go to the project folder and add this repo as an origin:
git add origin ....
Let’s push it up:
git push -u origin master
You can now refresh the Bitbucket page and will see there is now something in our repo.
3. Register an AWS account
If You already have an account, head over to the next step.
If You don’t have one, You can register a new account here: https://aws.amazon.com/
4. Create an S3 bucket
Log in to Your AWS account. On the AWS services search bar type: s3
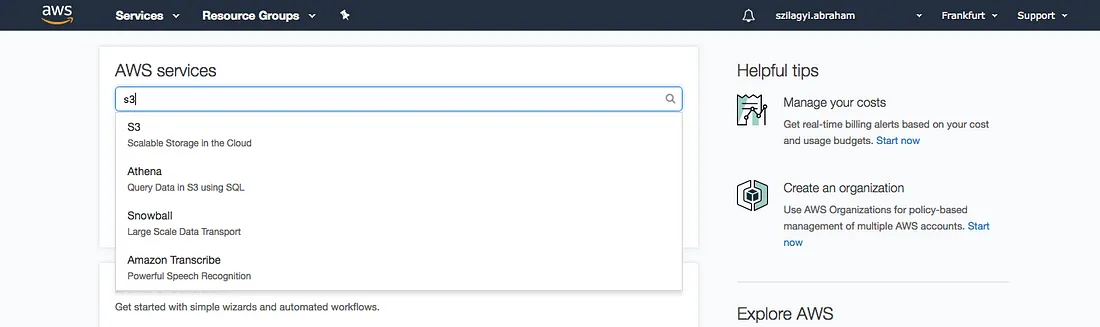
Select S3, and click Create bucket button!

The bucket name should be the domain name which You will use (Note: You have to own the domain). In my case this will be vueapp.szilagyiabo.com. Note: The bucket name has to be globally unique and You cannot modify it, after the bucket is created.
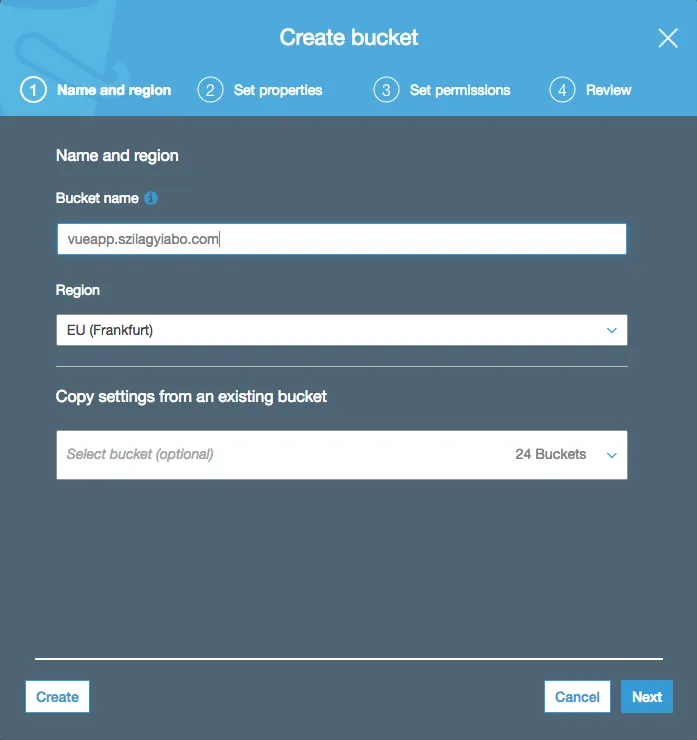
Click Next for a couple times. And the bucket is created.

The bucket is empty right now, but we will fill it with content soon.
5. Create an IAM user
We have to create a new user (inside our AWS infrastructure) for the automatic deployment. This will be a limited user, who can access to S3 only programatically. This IAM service user will deploy (copy) our code to AWS S3 via AWS CLI.
On the Service search select IAM. This service is the Identity Management for AWS.

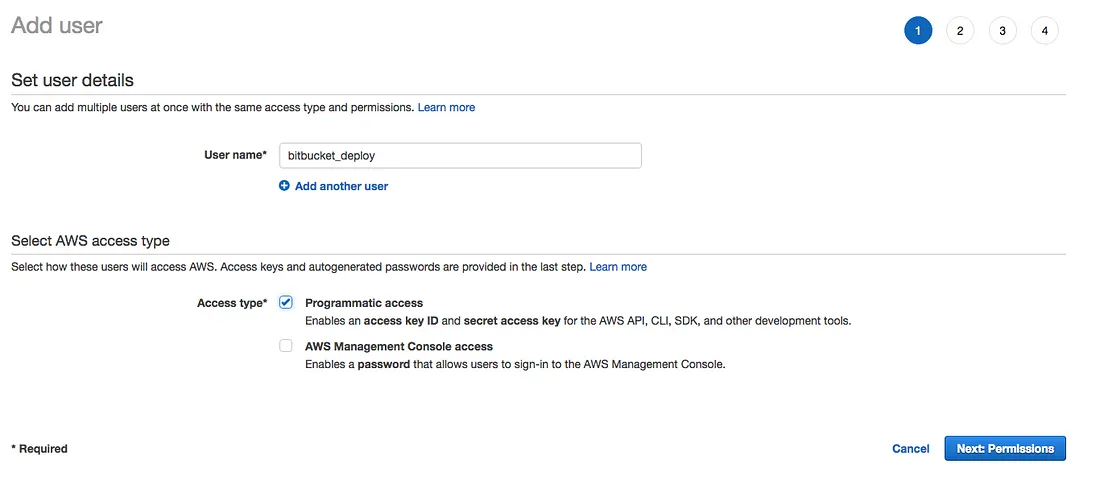
Navigate to Users menu, and select Add user.

Add a name for the user. It could be anything. Mine will be bitbucket_deploy. This user has to have a Programmatic access rights to access S3 during the deployment process. Click Next: Permissions!
Here we have to select Attach existing policies directly. Search for AmazonS3FullAccess, and select that policy. Click Next: Review

The Review page should look like this:
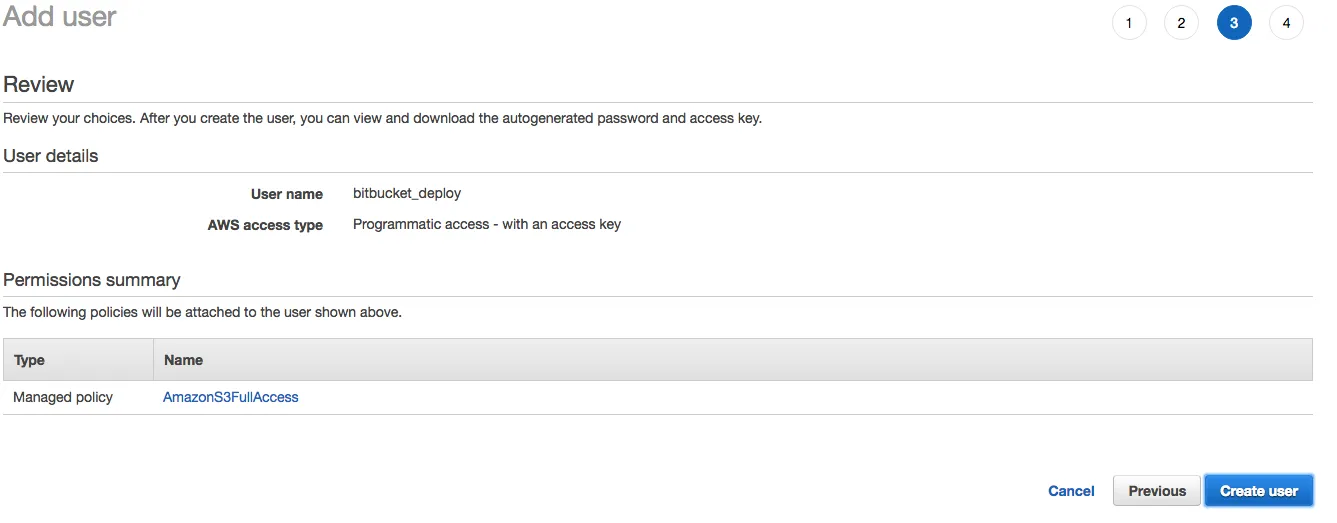
Click Create user.
After that, You will see the user credentials which can be downloaded as a csv file (recommended). You have to save the Access key ID, and the Secret access key too. This will be used, when we create the automatic deployment.
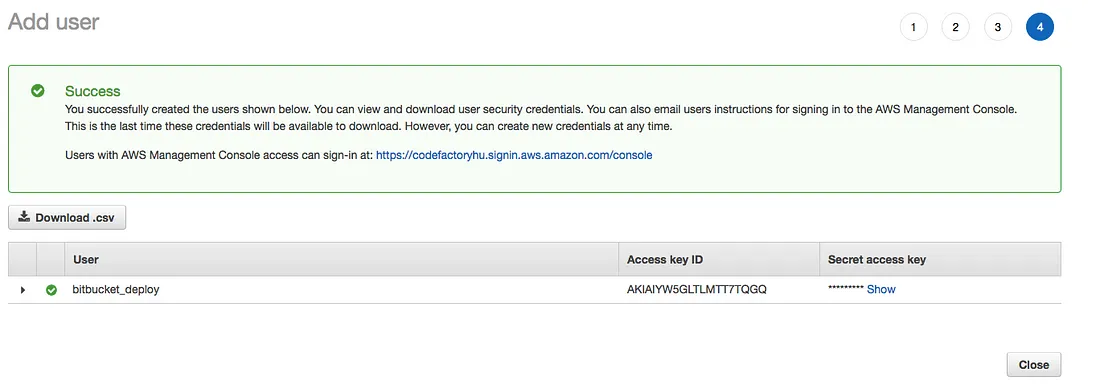
Click Close and let’s go back to Bitbucket!
6. Enable Bitbucket Pipeline
Pipeline is our automatic robot arm. It will run every CLI command instead of us. It will build our app and will aws cp the files from the dist folder. It could do more, if You want but that is enough for now.
On the repo page select the Settings from the left menu. On the bottom of the page there is a section called PIPELINES, click Settings. You will see something like this:
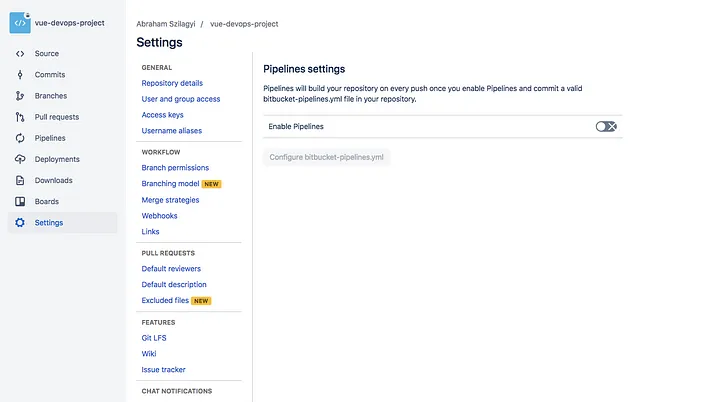
Let’s enable Pipelines!
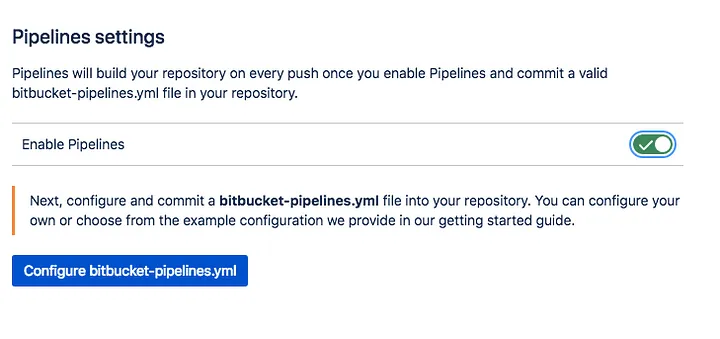
We are getting close… Don’t give up! Just a few more steps.
We are going to use environment variables in our pipeline config. It works like a standard OS or process environment variable. No magic at all. To make things work, we have to specify some variables which we will use during the deployment.
On the same settings page click Repository variables!
- S3_BUCKET_NAME should be the name of the previously created bucket
- AWS_SECRET_ACCESS_KEY should be the secret key what we got after creating the user in IAM
- AWS_ACCESS_KEY_ID should be the access key what we got along with the secret key
Now we have to create a bitbucket-pipelines.yml file in the root folder of the project, which looks like this.
# This is a sample build configuration for JavaScript.
# Check our guides at https://confluence.atlassian.com/x/14UWN for more examples.
# Only use spaces to indent your .yml configuration.
# -----
# You can specify a custom docker image from Docker Hub as your build environment.

image: node:8.12.0

pipelines:
  branches:
    master:
      - step:
          name: Generate Static Files
          caches:
            - node
          script:
            - npm install
            - npm run build
          artifacts:
            - dist/*
            - dist/**/*
            - dist/**/**
      - step:
          name: Deploy to S3
          image: atlassian/pipelines-awscli
          script:
            - aws s3 sync --acl public-read --delete ./dist s3://$S3_BUCKET_NAME
view raw
7. Commit Your code
Now You can add and commit changes, and push them up.
git add --all
git commit -m 'pipeline added'
git push origin master
If You click to Pipelines on the left menu, You can see something’s going on.

A new pipeline started to run a few seconds ago. If You click on the status or the commit name, You can get more details about what is happening.

If everything was OK, You have to see something like this.
Now check out the content of our AWS bucket.
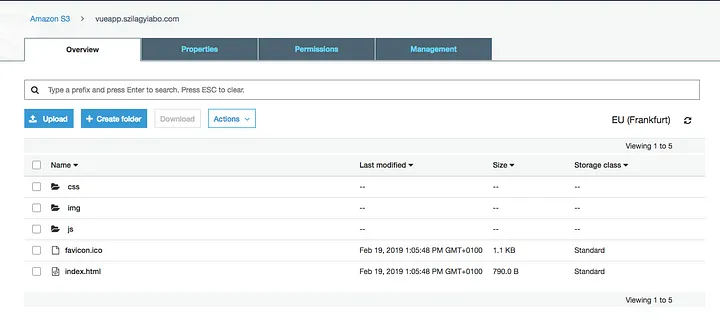
All the files and folders from the dist folder are there.
8. Enable static site hosting
Under the Properties tab You have to enable Static website hosting. Both index document and error document have to be index.html.
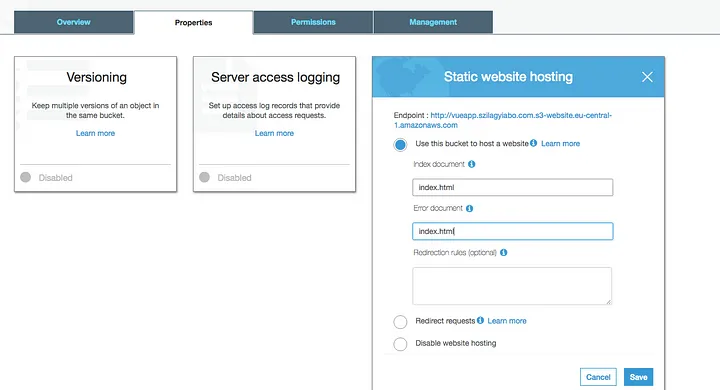
Click Save and check the generated endpoint.
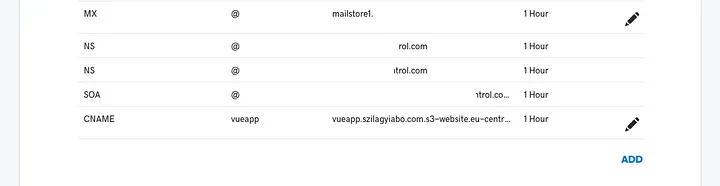
Now You can use this link to host Your app. You can set this URL as a CNAME property of the domain settings.
Here is how mine looks like:
If You check http://vueapp.szilagyiabo.com/ now, You can see how the end result looks like.
Final notes
In this example I tried to show You, how easy deployment can be. You can adopt these steps to other projects and technologies as well.